Copying tracks onto your computer
1. Use the USB cable provided with the recorder to connect it to your computer. The
recorder’s USB port is located behind a door in the bottom of the recorder:
2. If the Recorder isn’t on already, power it on.
3. If you are a Mac user: A drive icon labeled No Name will appear on the desktop.
Double-click on it to open and you’ll see all of the tracks you’ve recorded.
If you are a PC user: A message bubble will appear in the Windows Task tray
(lower right hand corner of the Desktop) saying that Windows has detected new
hardware then, after a moment, that the new hardware has been installed.
Eventually a window displaying the contents of the recorder will appear.
In both cases note: Aside from your tracks which will be named similar to
R09_0001.MP3, R09_0002.MP3, etc.
4. Click and drag your tracks onto your computer Desktop or into a folder.
5. Once you’re finished copying tracks onto your computer, you’ll want to disconnect it
from your computer.
If you are a Mac user: Drag the No Name disk icon to the Trash to eject it.
If you are a PC user: Double click on the “Safely remove hardware icon” in the
Windows task tray (green arrow located toward the lower right hand corner of the
Desktop). A window will open showing “USB mass storage device” item. Click on
the Stop button. In the next window click on the OK button.
In both cases: Disconnect the USB cable from the computer and recorder.
Clearing the memory on the recorder
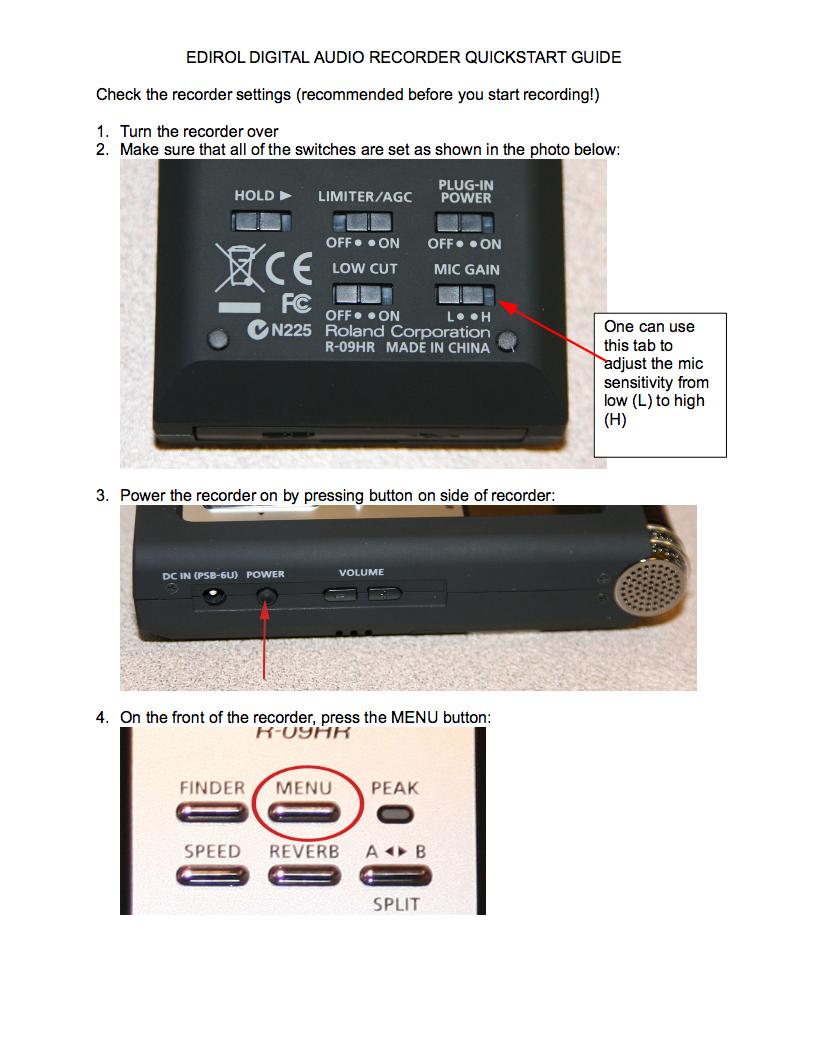
1. Push the menu button and use the down arrow to highlight “8 SD Card,” (please refer
to steps 4 through 6 in the “Check the recorder settings,” portion described above.
2. Use navigation arrows and control panel to select “2 Format,” and confirm “Yes,” that
you want to delete all the material in the memory.


